
15 min read ·
Plan a ProMaster Camper Build Without Missing the Expensive or Safety-Critical Details
Compare DIY, modular and installed routes, then verify fitment, true scope, travel-ready weight and electrical loads before ordering parts.
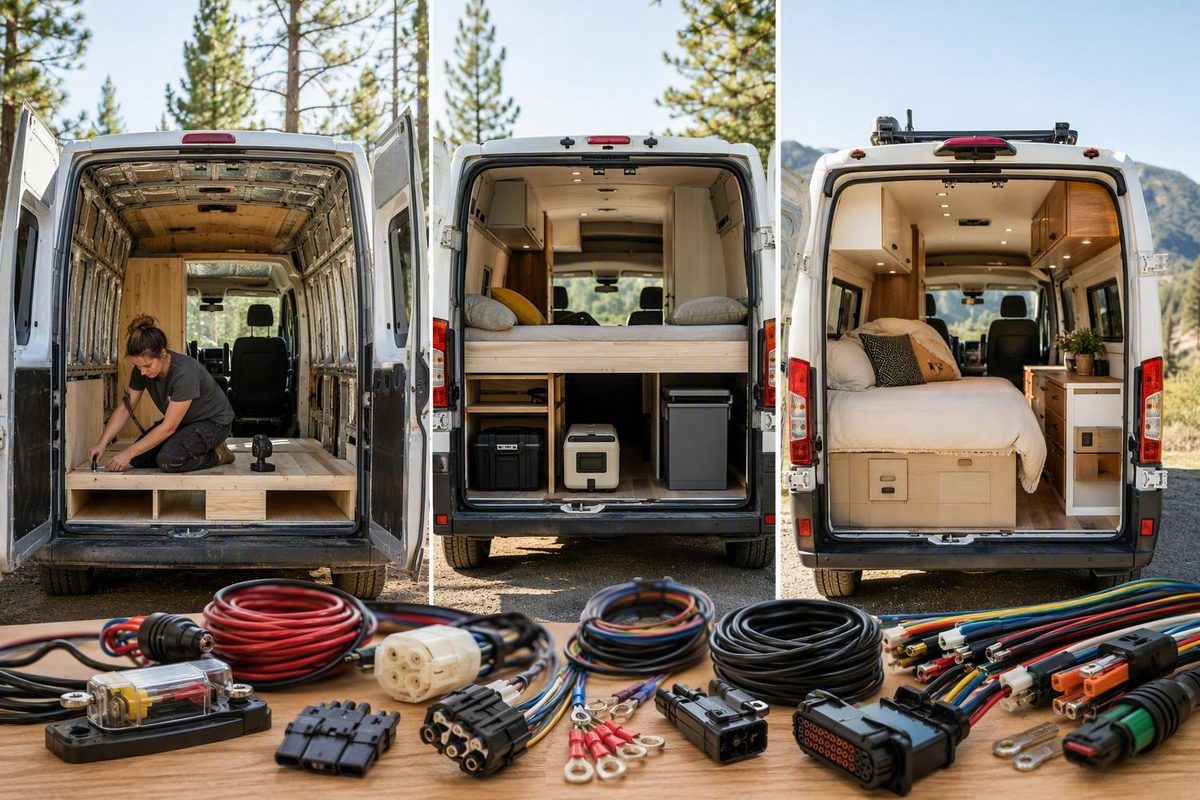
A successful ProMaster van conversion starts with the exact vehicle, not a kit photograph or headline price. Confirm the model year, 2500 or 3500 designation, wheelbase, roof height, body length, doors, windows, and factory equipment. Then choose a layout, calculate travel-ready weight, and complete an electrical load audit before ordering fitted components.
The product examples below concentrate on selected 159-inch conversions; they do not establish compatibility across every ProMaster year, wheelbase, roof, or extended-body configuration. The principal official safety source available here is historical 2014 Ram guidance. Use it to identify hazards, not as a current drilling map or authorization for a later van. Obtain current Ram body-builder information for your exact model year before structural, underbody, or factory-wiring work.
Choose your conversion route before buying components
There is no universally best route. Choose according to the labor, customization, documentation, reversibility, and installation responsibility you can accept.
| Route | Labor and customization | Documentation and reversibility | Coordination and safety responsibility |
|---|---|---|---|
| Full DIY | Highest owner labor and maximum control | You create drawings, records, and service access; reversibility depends on your design | You manage fitment, mounting, wiring, plumbing, and testing |
| Fitted parts à la carte | Moderate to high labor; customization around pre-cut components | Product instructions may help, but interfaces between brands remain undocumented unless you resolve them | You verify that mounting, utilities, and dimensions do not conflict |
| Modular package | Lower fabrication burden; usually limited to specified layouts and options | More coordinated installation may be available; removable furniture can preserve cargo use | The supplier defines part of the system, but you must identify excluded utilities and vehicle work |
| Professionally installed custom build | Lowest owner labor and potentially broad customization | Documentation, serviceability, and reversibility depend on the builder and contract | The builder coordinates installation; the owner still needs a defined scope, weight data, and acceptance tests |
VanLab lists its 159-inch package from $9,995, with either DIY assembly or installation at its Simi Valley, California workshop. Electrical equipment, insulation, upgraded flooring, cushions, plumbing, appliances, and wall or ceiling choices can increase the price, so the starting figure is not a travel-ready total. VanLab lists the base price, layouts, installation choice, and paid options.
Wayfarer’s Walt is a different scope: a seller-listed $25,500 installed conversion, excluding the donor van. Standard equipment includes the floor and interior finishing, insulation, removable furniture, a bed, basic lighting, window coverings, and a hand-pump water system. A heater, battery system, refrigerator, vent fan, and additional seating are options rather than universal standard equipment. Wayfarer details the Walt’s listed price, standard components, options, and donor-van exclusion.
Choose full DIY or à-la-carte components if you can measure accurately, resolve interfaces between products, maintain installation records, and manage structural, plumbing, and electrical work. A modular or professional route is more suitable when coordinated parts, formal installation documentation, or reduced hands-on time matters more than unrestricted customization.
Whichever route you select, put responsibility in writing. Identify who will verify mounting, circuit protection, leak testing, equipment ventilation, system shutdowns, and final vehicle weight.
Verify the van before choosing a kit or floor plan
“ProMaster 159” is not a complete fitment description. Model year, weight class, roof height, standard versus extended body, existing openings, and factory equipment can all affect suitability.
| Product | Stated application | Roof or body restrictions | Questions to resolve before purchase |
|---|---|---|---|
| VanLab package | 2013–present, 159-inch cargo van | Page does not resolve every roof or body variation | Exact year, extended-body status, openings, trim, and factory equipment |
| Wayfarer Walt | 2014–present ProMaster 2500 or 3500, 159-inch | High-roof empty cargo van; extended-length models excluded | Existing modifications, nonfactory openings, and accessory interference |
| Featherbuilt components | 136- and 159-inch wheelbases | Collection statement does not establish every roof, year, or body combination | Exact product, mounting rail, roof, year, and body length |
| Timber insulation kit | 2022 and newer, 159-inch | Individual product label is narrower than broad collection language | Roof and body configuration, openings, and exact kit contents |
Featherbuilt says its ProMaster collection covers 136- and 159-inch vans and includes fitted cabinets, tanks, door panels, storage products, and window covers. That collection-level statement does not prove that every product fits every roof height, model year, or extended configuration. Featherbuilt identifies its stated wheelbases and product categories.
Individual products may carry narrower labels than the surrounding catalog. Timber, for example, lists its pre-cut 159-inch insulation kit for 2022-and-newer ProMaster vans, while its collection also contains other ProMaster-specific and general camper components. Timber’s collection shows the insulation kit’s stated application.
Before ordering, send the vendor:
- VIN and model year
- 2500 or 3500 designation
- Wheelbase
- Roof height
- Standard or extended body
- Rear-door, sliding-door, and window arrangement
- Factory partition, flooring, wiring, and other installed equipment
- Existing aftermarket openings or modifications
- Proposed mounting method and required backing
- Required and included fasteners
- Installation-manual availability and revision date
Ask for written compatibility confirmation against the complete configuration. A broad seller statement or old technical document cannot establish current dimensions, mounting locations, or modification permission for a later vehicle.
Pick a layout by measuring the tradeoffs
Bed orientation affects the kitchen, aisle, seating, rear garage, equipment access, and whether bikes can remain inside. Compare layouts using finished dimensions rather than nominal cargo measurements.
| Layout | Main advantage | Main tradeoff | Measurements to confirm |
|---|---|---|---|
| North–south fixed bed | More independent sleeping length and often a larger garage | Uses more longitudinal floor area | Mattress length, aisle width, garage height, rear-door access |
| East–west fixed bed | Preserves length for a galley or seating | Sleeping length is limited by finished interior width | Wall-to-wall width, sleeper dimensions, trim, mattress compression |
| Convertible bed | Creates daytime seating or open floor space | Requires setup and bedding storage | Conversion time, cushion gaps, table storage, finished bed size |
| Removable furniture | Restores cargo flexibility | Utilities and storage may be simpler or exposed | Anchors, removal clearance, module weight, reconnection procedure |
VanLab’s layouts illustrate the tradeoff. Its North/South design emphasizes the bed and garage, while East/West moves capacity toward the kitchen. The seller’s specification table lists 100 cubic feet of garage space for North/South and 76 cubic feet for East/West; kitchen storage is listed as 19 versus 29 cubic feet. The same page contains conflicting bed dimensions, water capacities, and storage counts, so request a current dimensioned drawing rather than using those figures as fabrication dimensions. VanLab’s specifications show the stated layout capacities and internal inconsistencies.
A transverse bed can preserve longitudinal floor space, but bare cargo width is not sleeping length. Measure after accounting for insulation, furring, panels, trim, window surrounds, and curved or tapered wall sections. Test the proposed mattress with the actual sleeper, pillow, bedding, and normal sleeping posture.
Removability is a separate decision, not another bed orientation. Wayfarer says the Walt’s galley can be placed on either side and its furniture removed and reinstalled with a socket wrench. That may support alternating camper and cargo use, but it does not remove the need to plan anchors, lighting, ventilation, water storage, and access to electrical equipment.
Choose from the actual dimensions of sleepers, bikes, bins, appliances, tanks, and the electrical enclosure—not a photograph or nominal cargo width.
Build a budget that exposes what the base price leaves out
Use a scope worksheet and enter zero only when an item is unnecessary or demonstrably included.
| Budget line | Included? | Planned amount | Assumptions to record |
|---|---|---|---|
| Donor van | Purchase, inspection, repairs, registration | ||
| Flooring | Subfloor, finish, adhesive, edge trim | ||
| Insulation | Walls, roof, doors, thermal breaks | ||
| Wall and ceiling panels | Finish, fasteners, access panels | ||
| Cabinetry | Galley, overheads, latches, mounting hardware | ||
| Bed and cushions | Platform, mattress, upholstery, bedding | ||
| Ventilation | Fan, adapter, sealants, roof work | ||
| Heating | Heater, fuel supply, ducting, controls | ||
| Electrical | Batteries, charging, inverter, distribution, wiring, protection | ||
| Plumbing | Tanks, pump, tubing, drains, fittings | ||
| Refrigerator | Unit, ventilation, restraints | ||
| Cooking equipment | Appliance, energy supply, storage | ||
| Installation labor | Fabrication, wiring, plumbing, testing | ||
| Freight | Oversize or residential delivery | ||
| Taxes and fees | Sales tax, registration, inspection | ||
| Contingency | Rework, damage, overlooked hardware |
A Timber à-la-carte example shows how quickly a partial interior grows. Seller-listed starting prices of $2,185 for panels, $1,845 for flooring, $1,150 for the 2022-and-newer 159-inch insulation kit, and $1,754 for a galley total $6,934. That excludes electrical, plumbing, appliances, ventilation, heating, labor, shipping, and taxes. Compatibility still requires a product-level check. Timber lists the four component prices used in this calculation.
That partial total is not directly comparable with VanLab’s starting package price or Wayfarer’s installed conversion because the contents and labor differ. Wayfarer also provides an approximate $80,500 estimate for a new van plus the Walt conversion, based on an approximate $55,000 van and the $25,500 conversion. It is a vendor estimate, not a universal out-the-door total, and options can increase it. Wayfarer explains its approximate van-plus-conversion estimate.
Component shopping needs the same discipline. Featherbuilt lists examples including a $1,975 wheel-well cabinet bundle, $329 28-gallon wheel-well tanks, and a $1,700 gasoline-heater kit. Those figures do not by themselves cover mounting provisions, plumbing, electrical controls, freight, taxes, installation, or all compatibility hardware. Featherbuilt lists these component-level prices.
Treat every seller-listed price as a changeable snapshot. When comparing quotes, record the date you verified it and whether the figure includes the donor van, batteries, charging equipment, heat, refrigeration, plumbing, labor, freight, tax, and commissioning. Broad “DIY” and “professional” cost ranges are not useful until those boundaries are defined.
Plan the complete build in the right sequence
A useful sequence preserves access and prevents one system from blocking another:
- Verify the vehicle. Record its configuration, condition, ratings, and factory equipment.
- Define occupants and use. Identify sleeping positions, trip duration, climate, cooking method, bathroom expectations, and cargo.
- Measure the interior. Map ribs, curves, openings, and service areas.
- Choose the layout. Use full-size templates for the bed, galley, seating, bikes, and aisle.
- Audit weight and electrical loads. Complete both before choosing tanks, batteries, or major appliances.
- Map hidden vehicle systems. Locate OEM wiring, fuel parts, hoses, structural members, and parking-brake cables.
- Plan roof and body openings. Coordinate windows, fans, vents, cable entries, and exterior fittings.
- Rough in electrical and plumbing. Provide supported routes, service loops, isolation points, and access.
- Add insulation and panels. Keep connections and inspection points serviceable.
- Install cabinetry and appliances. Follow documented mounting and ventilation requirements.
- Test each system. Check charging, loads, leaks, drains, ventilation, controls, alarms, and shutdowns.
- Weigh the travel-ready van. Include occupants and normal gear, and obtain axle weights.
A complete plan may cover flooring, insulation, panels, ventilation, heating, cabinetry, sleeping space, plumbing, refrigeration, cooking, seating, storage, window coverings, and electrical distribution. Utilities and penetrations belong before finish work because a concealed connector, leaking fitting, or inaccessible fastener can otherwise require cabinet or panel removal.
Plan the roof as one system. Solar panels, exhaust fans, air conditioning, racks, awnings, and cable entries compete for limited space. Account for opening lids, shading, installation clearances, maintenance access, and interior cable or drain routes.
A minimal camper may use a secured bed, ventilation, lights, portable or hand-pump water, and removable furniture. A high-spec build can include lithium storage, solar, inverter-powered appliances, hot water, cabin heat, air conditioning, and an indoor shower.
One 159-inch extended showcase lists 400Ah of lithium storage, 400W of solar, a 3000W inverter, induction cooking, hot water, cabin heat, 12-volt air conditioning, and an indoor shower. It demonstrates the range of equipment that can be packaged into a build; it does not establish travel-ready weight, runtime, mounting quality, or engineering performance. Boho’s Basecamp portfolio lists the installed systems.
Treat payload and equipment placement as design inputs
Use the ratings on the specific vehicle, not a generic ProMaster maximum. Ram’s 2014 body-builder guidance says the combined chassis, conversion, anticipated passengers, liquids, luggage, and equipment must remain within the applicable gross vehicle rating. Review the 2014 ProMaster cautionary notes for the original weight language.
This is historical guidance. Confirm current requirements and ratings using the door-jamb labels and current Ram documentation for the exact model year and configuration.
| Item | Installed location | Weight to include | Main distribution effect |
|---|---|---|---|
| Cabinetry | Fixed | Front/rear axle; driver/passenger side | |
| House batteries | Fixed | ||
| Fresh-water tank | Tank plus water carried | ||
| Gray-water tank | Tank plus water collected | ||
| Refrigerator and food | Fixed plus contents | ||
| Bed and occupants | Fixed plus occupants and bedding | ||
| Bikes and carriers | Carrier plus bikes and gear | ||
| Fuel or propane equipment | Equipment plus fuel | ||
| General luggage | Trip-specific |
Water is a moving load. As fresh water is consumed, some of its weight may transfer to a gray tank elsewhere in the van. Model both the start and end of that transfer, including axle and side-to-side effects. Apply the same reasoning to removable bikes, food, and seasonal equipment.
After completion, load the van as it will travel and weigh it by axle. Compare the measured values with the vehicle’s configuration-specific gross and axle ratings. Do not estimate remaining payload from a broad model-range specification.
Design the house electrical system from the loads backward
Begin with an appliance audit, not a battery bundle or copied wiring diagram. Include every refrigerator, fan, light, pump, heater control, outlet, cooking appliance, computer, monitor, and intermittent load.
| Load | Voltage and power/current | Daily runtime or duty cycle | Startup, surge, or operating notes |
|---|---|---|---|
| Refrigerator | |||
| Roof fan | |||
| Lighting | |||
| Water pump | |||
| Heater controls and fan | |||
| Device outlets | |||
| Cooking appliance | |||
| Computer or monitor |
Separate direct DC loads from AC loads supplied through an inverter. Translate AC consumption back to battery-side energy and current while accounting for inverter losses and standby consumption. Run several operating cases: an average day, poor-solar weather, a no-driving day, and the hottest or coldest conditions you expect.
The factory starter battery and auxiliary house battery normally serve different purposes, with camper loads placed on the house system so vehicle starting capacity is preserved. Common charging sources are solar, alternator-based DC-to-DC charging, and shore power.
- Solar charging can operate while parked but is constrained by weather, shading, roof area, and seasonal conditions.
- Alternator-based DC-to-DC charging operates while driving and must be compatible with the vehicle, charger, and house battery.
Move through the design in this order: load audit, battery capacity, charging capacity, inverter rating, distribution, disconnects, conductors, connectors, fuses or breakers, monitoring, and physical enclosure.
| System block | Determine before purchase | Record in the final documentation |
|---|---|---|
| Load audit | Daily energy, peak current, surge | Appliance assumptions and scenarios |
| Battery storage | Required usable energy and permitted current | Chemistry, capacity, limits, enclosure |
| Solar charging | Array output and controller compatibility | Panel arrangement, routing, disconnects |
| Alternator charging | Charger demand and vehicle compatibility | Input/output protection and enable logic |
| Shore charging | Available input and battery profile | Inlet, charger, AC protection, grounding |
| DC distribution | Branch and simultaneous loads | Fuse schedule, routes, connector types |
| AC distribution | Inverter loads and shore arrangement | Breakers, receptacles, switching |
| Monitoring | Operating and diagnostic values | Sensors, alarms, shutdown thresholds |
| Overcurrent protection | Conductor and equipment limits | Device type, rating, protected conductor |
Wire and fuse selection depends on circuit current, conductor length, insulation temperature rating, terminal limits, bundling, environment, and component instructions. A fuse cannot be selected solely from appliance wattage, and a conductor is not acceptable simply because it fits into a lug. Verify the complete current path: conductor, terminal, crimp, connector, busbar, disconnect, and protective device.
A DIY Solar Power Forum discussion about one ProMaster design debated approximately 300A versus 400A inverter protection while key details—including cable length, terminal ratings, installation environment, and surge requirements—were incomplete. The disagreement is not a menu of valid universal sizes; it demonstrates why an isolated diagram or forum value cannot replace manufacturer instructions and a system-specific review. The forum thread records the disputed calculations and incomplete design context.
Have high-current battery and inverter circuits reviewed by a qualified person whenever you cannot verify conductor ampacity, voltage drop, terminal and busbar ratings, fuse requirements, grounding or bonding, enclosure protection, and equipment instructions.
Check the vehicle before drilling, coating, or tapping factory wiring
Inspect both sides of every proposed hole, fastener, underbody tank, heater, coating area, or wiring connection. Check for:
- Fuel tank, filler, lines, and sending-unit area
- Service tubes and hoses
- OEM harnesses, connectors, and control modules
- Chassis members and factory hardware
- Exhaust components and heat exposure
- Suspension travel and mounting points
- Steering components and linkages
- Parking-brake cables through their full operating range
- Interior trim, airbags, and restraint-related equipment
- Future exposure to water, dirt, and corrosion
Ram’s 2014 guidance says body cross sills should avoid chassis parts, fuel lines, and the fuel-tank sending unit. It warns against spraying undercoating or sound-deadening material onto wiring, powertrain, suspension, exhaust, steering, or related hardware and linkages. It also says conversion structures must not pinch, restrict, displace, or hold parking-brake cables out of position, and warns that adding lamps directly to headlamp or taillamp circuits without a separate relay may damage the electrical system.
Those warnings identify hazards; they are not current component locations or permission to modify a particular van. Before beginning work, assemble:
- Current Ram body-builder information for the exact model year
- Vendor installation drawings
- Fastener, backing, and mounting requirements
- Vehicle-integration wiring instructions
- Manuals for every battery, charger, inverter, appliance, and heater
- Written clarification of conflicting dimensions or compatibility statements
Finish planning with this five-step action plan:
- Identify the exact van configuration: VIN, year, designation, wheelbase, roof, body length, doors, windows, and factory equipment.
- Measure the intended occupants and equipment: sleepers, bikes, appliances, tanks, aisle, and service clearances.
- Compare routes by included scope: separate the donor van, options, utilities, labor, freight, and tax from the headline price.
- Complete payload and electrical-load worksheets: place heavy equipment deliberately and design the electrical system from documented loads.
- Obtain current vehicle and component documentation: buy fitted parts only after written compatibility confirmation, and weigh the finished travel-ready van by axle before travel.