
19 min read ·
How to Equip a 2005 Sport Trac for Trailer Towing—or Flat Towing
Ford documentation must confirm the exact Sport Trac can be flat towed before you select the base plate, tow bar, lighting and braking equipment.
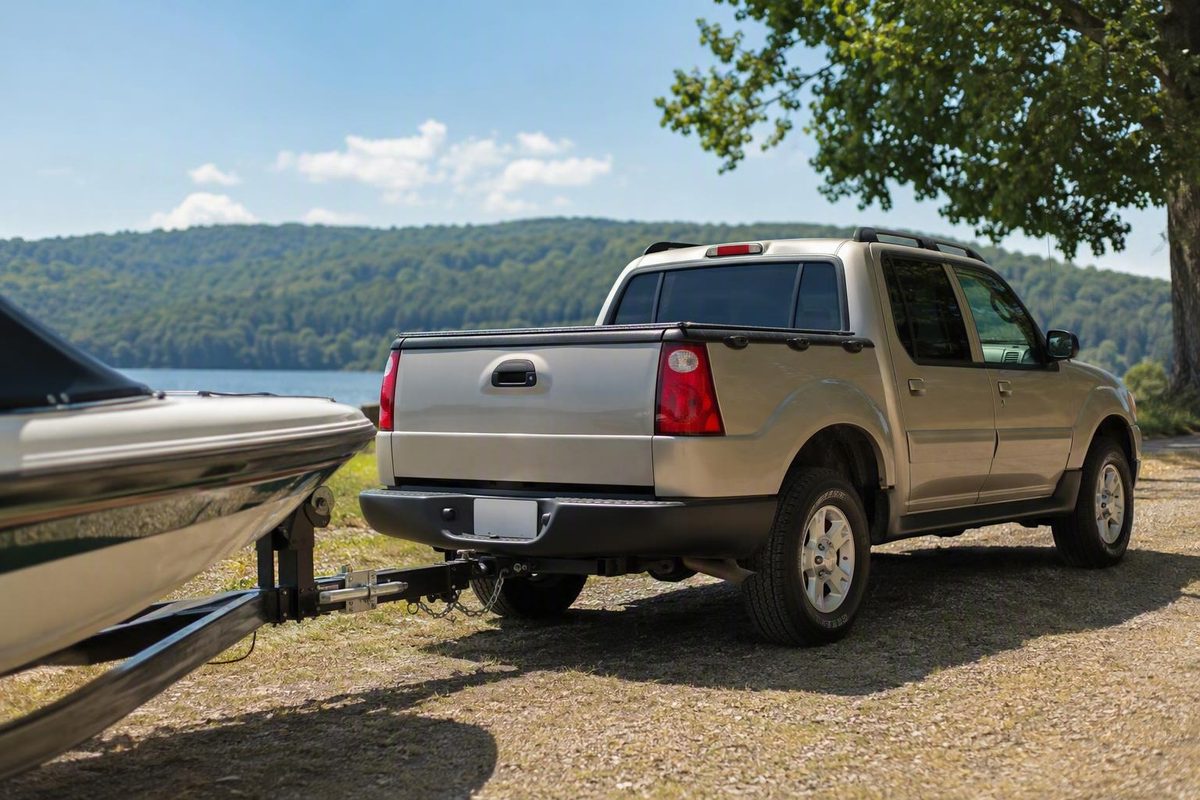
Fitting a “tow bar” to a 2005 Ford Explorer Sport Trac can describe two different projects:
- To pull a trailer with the Sport Trac: fit a rear receiver hitch, then add the correct coupling hardware and trailer wiring.
- To pull the Sport Trac behind an RV: fit a front base plate and compatible tow bar, but only after confirming that Ford permits the exact drivetrain to be towed with all four wheels down.
This is a product-selection and pre-installation guide, not a replacement for Ford documentation or the current instructions for the selected hitch, base plate, tow bar, wiring kit, or braking system. The available retailer listings identify possible hardware, but they do not supply enough authoritative information to publish part-specific mounting points, hardware orientation, tool lists, tightening sequences, or torque values.
First decide what “tow bar” means for your Sport Trac
Use this two-path decision before ordering equipment:
| Intended use | Hardware fitted to the Sport Trac | Mounting area |
|---|---|---|
| The Sport Trac pulls a trailer | Receiver hitch, ball mount, hitch ball, coupling hardware, and trailer wiring | Rear |
| An RV pulls the Sport Trac on all four wheels | Base plate, tow-bar connections, lighting, safety, and braking equipment | Front |
These systems work in opposite directions and are not interchangeable. A rear receiver provides a mounting point for a ball mount or compatible hitch accessory. A front base plate provides attachment points through which a tow bar can connect the Sport Trac to a motorhome.
Retailer catalogs reflect that distinction by separating tow-bar base plates, trailer hitches, trailer wiring, braking systems, and related equipment into different categories. A base-plate catalog includes 2005 as a selectable Sport Trac model year, but the catalog alone does not establish whether a particular drivetrain may be flat towed or identify every component needed for the complete system (etrailer’s Sport Trac base-plate catalog).
If you want the Sport Trac to pull a utility, boat, camping, or equipment trailer, continue with the rear-receiver sections.
If a motorhome will pull the Sport Trac, go to “If you mean flat towing the Sport Trac behind an RV.” Confirm drivetrain eligibility from Ford documentation before purchasing the base plate or tow bar.
Rear receiver hitches listed for a 2005 Sport Trac
The reviewed retailer catalogs identify three possible rear receivers:
- CURT 13407, including a retailer package described as 13407-001
- Reese Towpower 51141
- Draw-Tite Max-Frame 75112
These are retailer fitment claims, not Ford approval or a guarantee for every vehicle. Confirm the current part number against the exact truck and obtain the manufacturer’s current installation instructions before purchase.
| Retailer-listed option | Class and opening | Advertised installation | Advertised receiver rating | Listing notes |
|---|---|---|---|---|
| CURT 13407 / retailer package 13407-001 | Class III, 2-inch receiver | Bolt-on, no drilling; mounting hardware included | 5,000 lb gross trailer weight and 500 lb tongue weight | Exposed round-tube design; the package listing states that it is incompatible with bike racks that carry bicycles hanging vertically (TowUniverse CURT listing) |
| Reese Towpower 51141 | Class III, 2-inch receiver | No drilling; mounting hardware included | 5,000 lb gross trailer weight and 500 lb tongue weight | Receiver structure described as visible after installation (O’Reilly vehicle-filtered listing) |
| Draw-Tite Max-Frame 75112 | Class III, 2-inch receiver | No drilling; mounting hardware included | 5,000 lb gross trailer weight and 500 lb tongue weight | Receiver structure described as visible after installation (O’Reilly vehicle-filtered listing) |
The relationship between CURT 13407 and the retailer’s 13407-001 identifier should be confirmed before ordering. The suffix may describe a seller package rather than a different receiver. Check the part number marked on the actual hitch and make sure the corresponding current manufacturer manual applies to it.
A separate marketplace compatibility table for CURT 13407 includes 2005 Adrenalin, XLS, and XLT crew-cab configurations with listed 4.0-liter V6 gas or flex-fuel applications. That remains seller-supplied catalog information rather than manufacturer or VIN-specific confirmation (seller compatibility listing for CURT 13407).
What the advertised ratings do—and do not—mean
The advertised 5,000-pound gross trailer weight and 500-pound tongue-weight figures in these listings are receiver ratings. They do not establish how much every 2005 Sport Trac may tow.
The usable limit is the lowest applicable rating among:
- The Sport Trac in its exact configuration
- The receiver hitch
- The ball mount
- The hitch ball
- The trailer coupler
- Other load-bearing towing components
Use Ford documentation applicable to the truck’s drivetrain and equipment to determine the vehicle limits. A receiver with a higher rating does not increase the vehicle’s allowable capacity.
Vehicle loading also matters when evaluating a towing combination. Plan around the trailer as it will actually be used rather than relying only on its empty or advertised base weight.
Verify the truck, hitch, capacity, and condition before buying
A model-year match in a retailer search is only the beginning. Vehicle configuration, existing equipment, modifications, and age-related condition can all affect whether a listed product is appropriate.
Vehicle and fitment checklist
Record or confirm:
- 2005 model year and Explorer Sport Trac designation
- Trim level
- Engine
- 4x2 or 4x4 drivetrain
- VIN
- Factory towing equipment, if present
- Existing receiver or bumper towing equipment
- Existing trailer-wiring connector
- Spare-tire size and location
- Aftermarket bumper, exhaust, suspension, or body equipment
- Previous hitch or frame modifications
- Intended trailer type and expected loaded weight
Use this information with the hitch manufacturer’s current vehicle-specific catalog or provide it to a qualified installer. Do not rely only on a marketplace title stating that a product fits “all models.”
Before work begins, obtain the current installation manual for the exact part. That manual must govern:
- Approved mounting locations
- Supplied hardware and its orientation
- Any parts that must be moved for access
- Required tools
- Installation order
- Tightening method and torque specifications
- Product-specific restrictions and final checks
Do not transfer procedures or hardware among CURT, Reese, and Draw-Tite products. Similar-looking receivers may use different brackets, hardware, or installation methods.
Establish the vehicle limit separately
Find the Ford towing information applicable to the exact Sport Trac configuration. Do not substitute the receiver label or a retailer’s product description for the vehicle rating.
When estimating trailer weight, include the load carried in the trailer. The receiver, ball mount, hitch ball, trailer coupler, and other towing hardware must each be suitable for the planned load, but no individual component can raise the truck’s limit.
If the necessary Ford documentation or vehicle configuration cannot be established, resolve that uncertainty before towing.
Inspect an older truck before installation
A 2005 vehicle may have corrosion, collision repairs, wear, or modifications that are not reflected in a fitment catalog. Before treating the receiver as a straightforward bolt-on part, examine:
- Frame rails and proposed mounting areas
- Existing mounting holes
- Evidence of collision damage or structural repair
- Bumper mounts and nearby brackets
- Spare-tire carrier and cable mechanism
- Exhaust position and supports
- Aftermarket equipment near the mounting area
- Brakes, tires, and suspension
- Engine, transmission, and drivetrain condition
- Visible fluid leaks
A vehicle-specific U-Haul page similarly advises considering the engine, transmission, suspension, brakes, and tires before towing with an older Sport Trac, and notes that suitable towing wiring is required in addition to the hitch (U-Haul’s 2005 Sport Trac hitch page).
If the proposed mounting area is heavily corroded, distorted, collision-damaged, repaired, or modified, have it assessed by a qualified professional before installing the receiver. A cataloged bolt-on fit assumes that the truck still provides suitable mounting structure.
Do not assume spare-tire clearance
Check the selected receiver against the actual spare tire, carrier, exhaust, bumper, and aftermarket equipment.
Owner reports about first-generation Sport Tracs conflict. Some owners report retaining a full-size spare with particular hitch designs, while other comments question the clearance provided by certain receivers. These reports are anecdotal and do not guarantee the fit of a current product on an individual 2005 truck (Sport Trac owner discussion).
Brand name alone cannot establish clearance. The hitch design, tire dimensions, carrier condition, existing equipment, and final installed position may all affect the available space. If retaining a full-size spare is essential, confirm the requirement before ordering.
Prepare for a no-drill rear-hitch installation
“No drill” means that the reviewed listings advertise the receivers as using existing mounting provisions. It does not mean that every truck is ready for installation without inspection, or that the hitch may be fitted without its official instructions.
Get the exact instructions and inspect the package
Before lifting the receiver into place:
- Match the number marked on the hitch with the ordered part.
- Confirm that the current manual applies to that exact part.
- Compare all supplied mounting components with the manual’s parts diagram.
- Check the receiver and brackets for obvious shipping damage.
- Stop if the hardware, hitch, or instructions do not agree.
The correct response to missing or mismatched hardware is to contact the manufacturer or seller. This guide cannot determine whether a substitute fastener or spacer is suitable.
Likewise, do not enlarge holes, grind brackets, bend the hitch, or drill the frame to solve an unexplained fit problem. The rear receivers discussed here are advertised as no-drill designs. If the vehicle does not match the manual or the hitch will not align as described, stop and resolve the discrepancy with the manufacturer or a qualified installer.
Prepare the work area
Use a level, stable work area and secure the vehicle against movement. Follow the selected manufacturer’s instructions for any lifting, access, or component removal.
A receiver is cumbersome to position. Arrange suitable assistance rather than attempting to hold it in place while also starting the hardware. Use only the tools and installation method specified by the current hitch instructions.
Move or lower the spare tire only if the selected manual requires it. If access exposes the mounting area, inspect the frame, carrier, exhaust, wiring, and nearby brackets before proceeding.
Treat short installation estimates cautiously
The CURT retailer listing describes the job as novice-level and estimates approximately 30 minutes, but that is a seller estimate rather than a guaranteed completion time (TowUniverse CURT listing).
Corrosion, old repairs, damaged mounting provisions, undercoating, aftermarket equipment, or a difficult spare-tire mechanism may complicate work on an older vehicle. Do not let a retail time estimate determine whether the truck is suitable for a DIY installation.
Fit the receiver using the selected hitch manual
The following sequence is a readiness framework, not part-specific installation instructions. The current manual for the selected receiver must supply the actual mounting locations, hardware arrangement, tools, sequence, and torque values.
1. Compare the vehicle with the manual
Locate every mounting area identified in the hitch instructions and compare the truck with the manual’s diagrams before placing hardware.
Resolve any significant difference, including:
- An existing hitch or bracket
- Previous drilling or enlarged holes
- Structural repairs
- Unusual bumper hardware
- Aftermarket exhaust routing
- Wiring across a mounting area
- Spare-tire interference
- Corrosion or distorted metal
If the truck does not match the documented installation layout, ask the hitch manufacturer or a qualified installer to determine why.
2. Identify the prescribed hardware
Organize the supplied components according to the manual. Keep the selected product’s hardware and instructions together.
Do not infer that hardware from another brand is interchangeable. If the parts differ from the manual’s diagram or inventory, stop rather than guessing at the intended arrangement.
3. Position the receiver as instructed
Use suitable assistance to bring the receiver to the documented mounting position. Before installing or tightening hardware, make sure no wiring or other component is caught between the hitch and vehicle.
The hitch should reach its specified position using the method described in its manual. Do not use unexplained force or improvised vehicle modifications to overcome a mismatch.
4. Install and tighten the hardware using the official procedure
Follow the selected manual for:
- Bolt, plate, spacer, washer, and nut placement
- Hardware orientation
- Initial assembly
- Tightening order
- Torque specifications
- Any product-specific recheck procedure
This guide intentionally does not publish a universal sequence or torque figure. Those details cannot safely be inferred across the three listed products.
Use the tightening equipment required by the manual. If hardware spins, binds, fails to seat, or differs from the parts diagram, stop and contact the manufacturer or installer.
5. Restore moved components and inspect the result
Return the spare tire or any other moved component to the position required by the instructions. Compare the completed work with the manufacturer’s final diagrams and checklist.
Confirm that the installed receiver does not create an unresolved conflict with:
- The spare tire and carrier
- The exhaust
- The bumper or its brackets
- Trailer wiring
- Nearby suspension areas
- Aftermarket equipment
- The receiver opening or safety-chain attachment points
Do not accept unexplained contact, trapped wiring, or forced alignment as a normal consequence of installation.
Complete the trailer setup: ball mount, wiring, and brakes
A receiver is only the vehicle-mounted foundation of a trailer-towing system. It does not by itself provide the ball, coupling height, trailer-light connection, or electric-brake control.
Coupling-hardware checklist
Depending on the trailer and selected equipment, the complete setup may need:
- A ball mount that fits the receiver
- A hitch ball matching the trailer coupler
- A compatible hitch pin and retaining clip or lock
- Suitable safety-chain attachment points
- Trailer-light wiring and the appropriate connector
- Additional electrical and brake-control equipment where required by the trailer setup
Confirm each component from its own markings and manufacturer instructions. Apply the lowest-rated-component principle to the complete combination.
Select rise or drop by measurement
Do not choose ball-mount rise or drop from the vehicle name alone. Measure the Sport Trac and loaded trailer on level ground according to the ball-mount manufacturer’s method.
Tire size, suspension condition, trailer loading, and coupler height can affect the required geometry. Follow the component manufacturer’s instructions concerning orientation and installation rather than assuming that every ball mount may be inverted.
Locate and test any existing four-pin connector
First-generation Sport Trac owners have reported finding a flat four-pin trailer-light connector near the spare tire and rear bumper. One example in the available discussion concerns a 2002 truck, so it does not prove that every 2005 Sport Trac has the same connector or that any existing wiring remains functional.
Inspect the individual vehicle. If a connector is present:
- Confirm that it belongs to the trailer-light circuit.
- Check the connector and harness for damage or corrosion.
- Test its functions electrically.
- Repair faults using an appropriate documented wiring method.
Do not apply an owner-reported fuse location or repair procedure to every truck without checking the Ford information applicable to the vehicle.
Understand the four-pin limitation
The available owner discussion distinguishes the reported four-pin trailer-light connection from electric trailer-brake wiring. A four-pin lighting connector does not by itself provide electric trailer-brake control.
If the trailer has electric brakes, treat the braking connection as a separate system-design task. It may require an appropriate trailer connector, protected electrical circuits, and a compatible brake controller. Select and install that equipment according to the vehicle and component manufacturers’ documentation rather than assuming that changing the socket creates the necessary circuits.
Protect and test the wiring
Follow the wiring-kit manufacturer’s instructions for component selection, terminations, protection, support, and routing. Avoid any location that the applicable instructions identify as unsuitable because of heat, abrasion, impact, or vehicle movement.
Before road use, test the trailer’s lighting with the complete combination connected. Where an electric-brake system is installed, test it separately according to the brake-controller and trailer-brake instructions.
Inspect and verify the completed trailer-towing installation
Final tightening is not the only verification step. Compare the installation with the selected hitch manufacturer’s completion checklist before connecting a trailer.
Receiver and underbody inspection
Confirm from the manual that:
- Every specified mounting component is present.
- The hardware is installed in the documented position.
- Tightening was completed by the prescribed method.
- The hitch sits in its intended position.
- Wiring is not trapped between the receiver and frame.
- The spare tire can be retained and operated as intended.
- The exhaust and bumper do not have unresolved contact with the hitch.
- The receiver opening and safety-chain attachment points remain accessible.
If a moved component cannot be restored as the manual requires, the installation is not complete.
Coupling inspection
Before towing, check the connection against the instructions for the ball mount, ball, coupler, pin, and trailer:
- The ball mount fits and is retained correctly.
- The hitch ball matches the trailer coupler.
- The ball and ball mount are assembled as their manufacturers specify.
- The coupler closes and locks correctly.
- Safety chains connect to appropriate attachment points.
- The electrical cable remains connected without being pulled during normal movement.
- The trailer jack and coupling equipment have suitable clearance.
Each load-bearing component must be appropriate for the intended load. A higher rating on one part cannot compensate for a lower applicable limit elsewhere.
Electrical and brake checks
With the trailer connected, test its tail, stop, and turn-light operation. Check that the connector remains secure and that the cable is not under tension.
If electric trailer brakes are fitted, test their operation separately according to the relevant component instructions. Working trailer lights do not demonstrate that the brake controller and brake circuit are functioning.
Confirm capacity and vehicle readiness
Use Ford’s configuration-specific vehicle limits and the lowest-rated component in the towing system. Do not treat the receiver’s advertised 5,000-pound rating as automatic permission for the Sport Trac to tow that amount; the retailer listings themselves describe that figure as a hitch rating and recognize that the vehicle may impose a lower limit.
Plan using the trailer’s loaded condition and the resulting load at the hitch. Before towing with an older vehicle, also assess the condition of its brakes, tires, suspension, engine, transmission, and drivetrain.
Reinspect the installation if the receiver moves, hardware loosens, wiring becomes damaged, the exhaust contacts the hitch, or unusual noises appear. Stop towing until the cause is resolved.
If you mean flat towing the Sport Trac behind an RV
Flat towing is entirely separate from installing a rear trailer receiver. The towing load enters the front of the Sport Trac through a vehicle-specific base plate connected to a tow bar extending from the motorhome.
Do not buy a base plate merely because a retailer catalogs it for the body and model year. First determine from Ford documentation whether the exact Sport Trac drivetrain may be towed with all four wheels down and what equipment or procedure Ford requires.
Make drivetrain eligibility the first gate
Before purchasing hardware, identify:
- Whether the Sport Trac is 4x2 or 4x4
- Its exact transmission and drivetrain configuration
- Whether any verified Ford neutral-tow equipment is present
- What the applicable Ford documentation says about recreational towing
- Whether any required equipment remains functional
- Every operating condition or restriction stated by Ford
Physical base-plate compatibility does not establish that the transmission, transfer case, or other drivetrain components can tolerate flat towing.
Third-party discussions report differing limitations and procedures, but those reports are not substitutes for Ford instructions applicable to the exact vehicle. Do not adopt an online transfer-case sequence, speed limit, distance limit, or driveshaft procedure as though it were verified Ford guidance.
Any drilling, drivetrain modification, or driveshaft work should be treated as professional-level work unless authoritative documentation and installer competence establish an appropriate procedure.
Retailer-identified base plate and tow bar
A specialist retailer identifies Roadmaster base plate 474-1 as a fit for a 2005 Ford Explorer Sport Trac. It says the base plate does not attach to the factory tow brackets and that installation requires some frame drilling. The same retailer suggests the Roadmaster Falcon 2 as one compatible tow-bar option, not necessarily the only possible choice (etrailer’s 2005 Sport Trac flat-towing guidance).
That recommendation identifies a commercial hardware path; it does not establish Ford approval to flat tow every 2005 Sport Trac. Confirm current base-plate fitment and obtain the applicable Roadmaster instructions before installation.
This front base-plate installation must not be confused with the no-drill rear receivers discussed earlier. Because the retailer says frame drilling is required, correct placement, hardware installation, and tightening must come from the current base-plate instructions. Professional installation is appropriate when the installer does not have the documentation, tools, or relevant experience.
Components in a complete flat-tow system
After Ford documentation establishes drivetrain eligibility, plan the equipment as a compatible system:
- Vehicle-specific front base plate
- Compatible tow bar
- Safety cables
- Towed-vehicle lighting
- Supplemental braking system
- Breakaway equipment when part of the selected system
- Electrical connection between the RV and Sport Trac
- A height-correction adapter if measurement shows one is needed
Choose any height-correction equipment from actual measurements taken according to the tow-bar manufacturer’s instructions. Do not select an adapter by appearance alone.
Flat-tow lighting is also a separate installation from connecting a trailer to a rear four-pin socket. Follow the selected lighting system’s instructions for integrating the motorhome and Sport Trac circuits.
Use this order:
- Verify four-wheels-down eligibility from Ford documentation for the exact drivetrain.
- Confirm current base-plate fitment.
- Obtain the official base-plate and tow-bar instructions.
- Inspect the front mounting area.
- Select compatible towing, safety, lighting, and braking equipment.
- Measure whether height correction is needed.
- Use a suitably qualified installer for drilling or drivetrain-related work when appropriate.
- Test the complete combination according to the component instructions before travel.
Frequently asked questions
Will a CURT 13407 hitch fit every 2005 Ford Explorer Sport Trac?
Do not assume that it will. Retailers advertise CURT 13407 or a 13407-001 package for 2005 Sport Tracs, and one seller’s table includes Adrenalin, XLS, and XLT crew-cab configurations with listed 4.0-liter V6 applications. Those are retailer claims, not a guarantee covering every VIN, modification, repair, or item of existing equipment.
Confirm the current part number using the truck’s exact configuration. Inspect the rear mounting area, bumper, exhaust, spare-tire arrangement, and previous hitch work before ordering.
Do the listed rear receiver hitches require drilling?
The reviewed listings describe CURT 13407/13407-001, Reese 51141, and Draw-Tite 75112 as no-drill rear receivers supplied with mounting hardware. That means they are advertised to use existing mounting provisions.
It does not authorize drilling, grinding, slotting, or other modifications when a receiver fails to align. Stop if the truck does not match the current instructions.
The Roadmaster front base plate discussed for flat towing is different: the specialist retailer says its installation requires some frame drilling.
Does a 2005 Sport Trac already have a four-pin trailer-light connector?
It may, but inspect and test the individual truck. First-generation owners have reported a flat four-pin connector near the spare tire and rear bumper, but the available reports are anecdotal and do not establish that every 2005 Sport Trac has intact, functional wiring.
Even when present and working, a four-pin lighting connector does not by itself provide electric trailer-brake control.
Can the Sport Trac tow 5,000 pounds because the receiver is rated for 5,000 pounds?
No. The advertised 5,000-pound gross trailer weight and 500-pound tongue-weight figures are receiver ratings, not proof of the Sport Trac’s allowable towing capacity.
Use Ford’s limit for the exact vehicle configuration and the lowest applicable rating among the receiver, ball mount, hitch ball, trailer coupler, and other towing components. Plan around the trailer’s actual loaded condition.
Can I attach an RV tow bar directly to the Sport Trac’s factory tow brackets?
Not with the Roadmaster system identified by the specialist retailer. Its guidance says base plate 474-1 does not attach to the factory tow brackets and requires some frame drilling on a 2005 Sport Trac.
Even with a physically compatible base plate, verify from Ford documentation that the exact drivetrain is eligible for four-wheels-down towing before buying or installing flat-tow equipment.
Conclusion
A rear receiver and a front flat-tow base plate solve different problems. For trailer use, retailers list several Class III, 2-inch, no-drill receivers for the 2005 Sport Trac, but exact fitment must be confirmed and installation must follow the current manual for the selected product. Complete the system with compatible coupling hardware and wiring, then remain within Ford’s configuration-specific limits.
For RV flat towing, drivetrain eligibility comes first. Only after Ford documentation confirms that the exact Sport Trac may be flat towed should you proceed with the base plate, tow bar, safety cables, lighting, braking equipment, height measurements, and any required professional drilling or drivetrain work.